How to Record Your Hearthstone Games

This guide aims to get you set up to record your Hearthstone game quickly and easily. We will be using OBS in this guide – a very popular tool for live streaming. If you already do or intended to use OBS for streaming and/or recording other games as well, bear in mind that OBS lets you manage multiple Profiles. How to set up Profiles properly is outside the scope of this guide.
It is important to note that this guide is strictly intended to get you set up to record your game, not for streaming.
For a guide on how to use OBS to stream your games, visit Skyride’s Blog.
1. Download and run OBS
Download OBS from http://obsproject.com/download.
Unless you already have it, of course! If you don’t have the latest version, don’t worry, the program should update itself upon launch.
2. Open Hearthstone
In the next step we will use OBS to select a game to capture. We list Hearthstone here, but of course this guide works just as well for any other game! What matters though is that the game is running before proceeding to the next step.
3. Add a scene
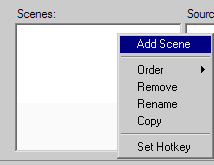
Right-click in the box labelled ‘Scenes‘, and select ‘Add Scene‘, followed by OK.
4. Add a source to your scene
A scene can consist of multiple sources. Usually one of them is your game. You could also add images here as an overlay, for example.
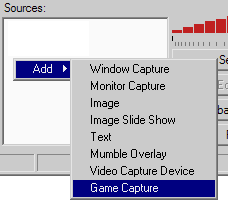
Right click in the box labelled ‘Sources‘, select ‘Add‘ and then ‘Game Capture‘.
4. Capture Hearthstone

In the new window that pops up, select Hearthstone (or whatever your game of choice is) from the list. Then click OK.
5. Set resolution
If you stream and haven’t got the most amazing internet speed in the world, you will definitely want to lower your streaming resolution. For recording it doesn’t matter so much, unless your computer is having troubles writing to disk.

In the menu, go to Settings, then find the ‘Video‘ tab on the left hand side. Use your game’s actual resolution in the ‘Base Resolution‘ box. The resolution in which the file is recorded is selected further down, under ‘Resolution Downscale‘.
6. Bit rate
Changing the bit rate limits the amount of data per second that you stream (be it to file or to the internet). Lowering this will thus implicityly decrease the quality of your stream. Twitch.tv recommends a maximum value of 3500.
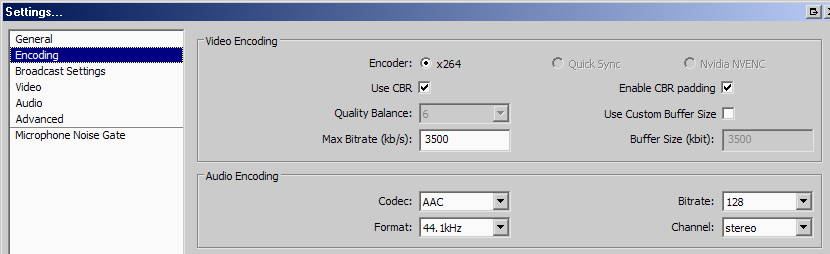
For just recording, this value is fine, but if you are keen on having a high quality recording, feel free to move it up to 5000. Make sure you keep the accompanying ‘Buffer Size‘ equal to this (i.e. do not check ‘Use Custom Buffer Size‘).
7. File Output Only
Still in the Settings screen, find the ‘Broadcast settings‘ on the left hand side. If you live stream, this is where you enter your Twitch details. For recording only, we select ‘File Output Only‘ in the ‘Mode‘ list.
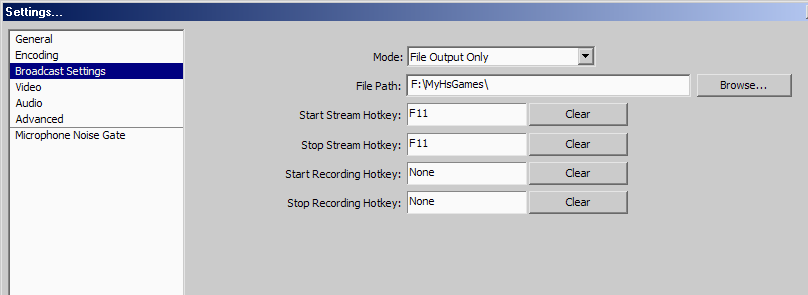
Next to the File path box there is a browse button. Use this to select where you want to save your recording. We advise keeping the file format MP4.
8. Explore other settings
Feel free to explore other settings, but don’t touch anything if you aren’t 100% sure of what it does! What we recommend you look into is how to set up Profiles in OBS, so that you can easily switch between live streaming settings, recording settings and even different settings per game or application. This is outside the scope of this guide, though.
You are now ready to record! GLHF!
Leave a Reply
You must be logged in to post a comment.
Comments